Vibration Sensor – Phantom Gen 3 Installation Guide
Meet the third generation Phantom Bluetooth Wireless Triaxial Accelerometer. With all the features the Phantom wireless eco-system has become known for! The new design allows repeatable, reliable use in even the worst environmental scenarios. With the new integrated threaded mounting assembly, you may easily, and quickly adjust the sensors dominant axis as necessary without the need for any special tools or mounting pads. Read More»
Content
1. Machine installation
To achieve the correct vibration analysis, it is crucial to know how the sensor is placed in the machine. The vibration sensor contains a triaxial accelerometer that measures vibration in three axes at the same time. The sensor also has an engraving on its front face that indicates the position of these axes. It is important to define the position of the sensor before its configuration in DigivibeMX®.
The image below shows a Phantom™ Vibration Sensor placed on a three-phase motor. We can also see that the Z-axis is parallel to the axial axis of the motor; the Y-axis corresponds to the vertical axis, and the X-axis is orthogonal to the other two and corresponds to the horizontal axis of the motor. This means that in DigivibeMX® we should use the following configuration: H for the Z-axis, V for the Y-axis, and A for the X-axis.

Another possible configuration would be to place the sensor in a plane transverse to the machine axis. For this configuration the values to be used should be as follows: H for the Y-axis, V for the X-axis, and A for the Z-axis:

2. DigivibeMX Configuration
Here we will help you with the first configuration and setting of these Sensors. We will cover just the general configuration settings. For a more specific installation, visit the Phantom™ System Setup ».
The first step to star getting vibration data from your phantom, is to register your sensor on your database using DigivibeMX®.
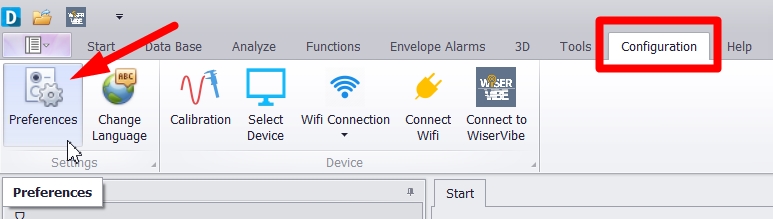

Now, the Phantom™ menu will show in the window’s menu bar. Go to the Phantom window and select Wizard. The Phantom Configuration Wizard screen opens in a new window. Select Add Phantom.
2.1. Add Phantom
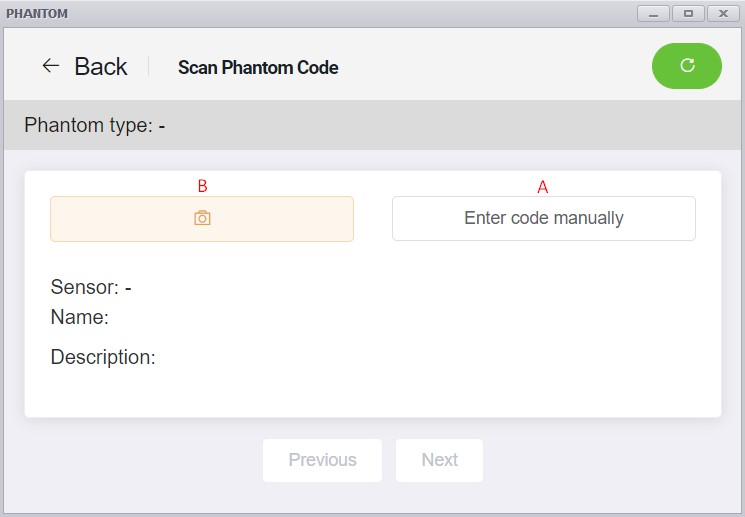
In the Scan Phantom Code window, you have two options: Option A allows you to manually enter a phantom code with the Enter Code Manually button, and with option B you can scan the phantom QR code, with the camera button.
A. Manual Option
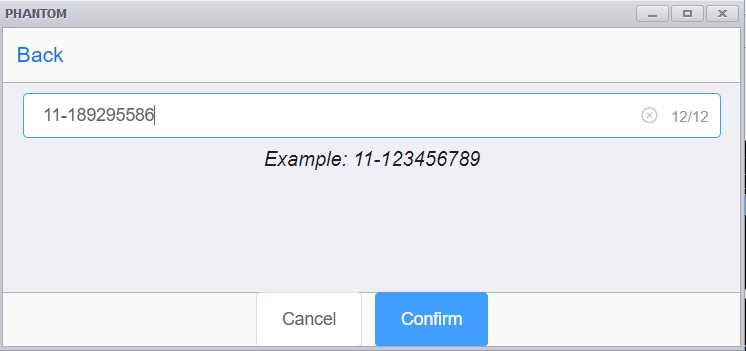
You can add Phantom™ sensors by using an 11-digit ID code, select the Enter Code Manually button:

The sensor general information will appear in the Status window. Click NEXT to confirm and continue.
B. QR Code Scan
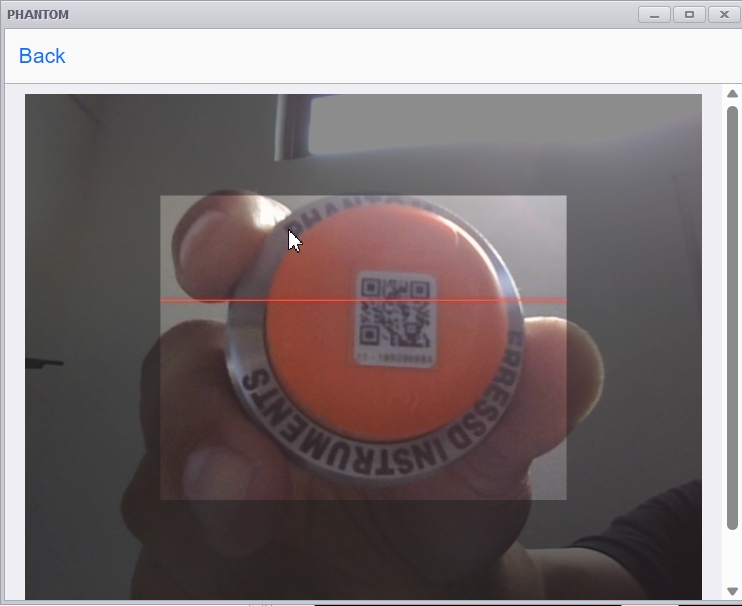
Click the QR Code Reader button:

The Code Bar Reader window opens (PC, laptop, or tablet computer camera required). Scan your sensor QR code placing it in font of the generated square:
The sensor general information will appear in the Status window. Click NEXT to confirm and continue.
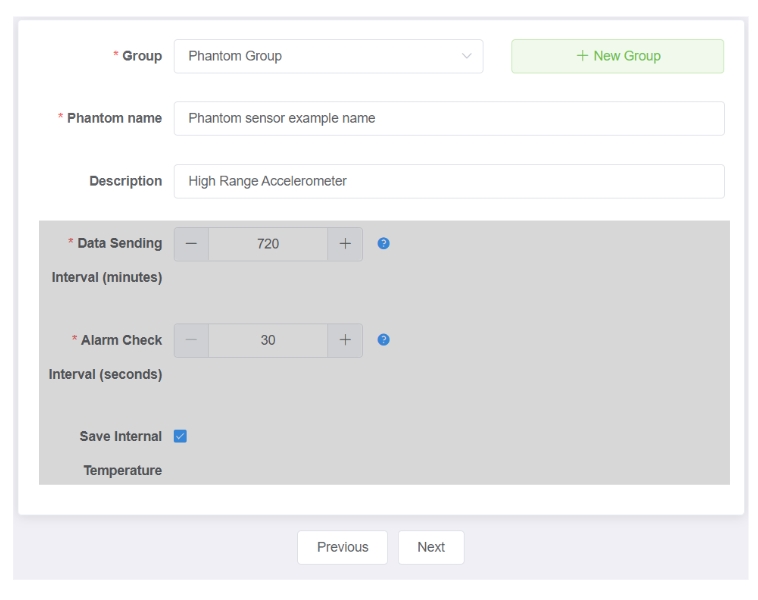
2.2. Group and Name
- With the group box, we can select a previous group name from the list or type a new one to create a group.
- In the name box, you can type a name for your device to simplify the phantom identification.
- On the description box, you will see what kind of phantom you are using.
The gray highlighted section should not be modified, as these configurations are for the first-generation sensors that work with a gateway 1.
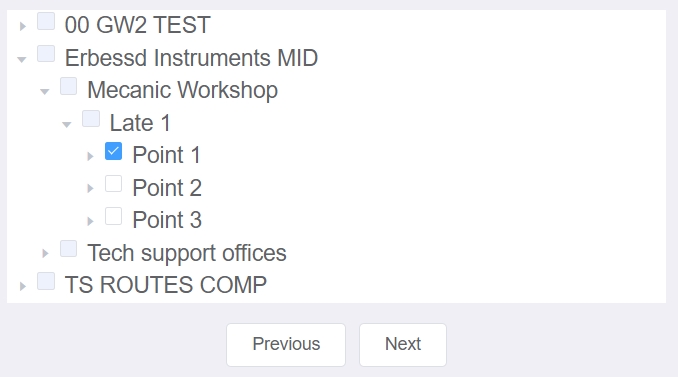
2.3. Assign Phantom
In the next window, we find the Assign Channels screen, here we can assign the device to a previously created analysis point in a selected machine, find it from the tree and click the checkbox. You can only set one sensor per point:
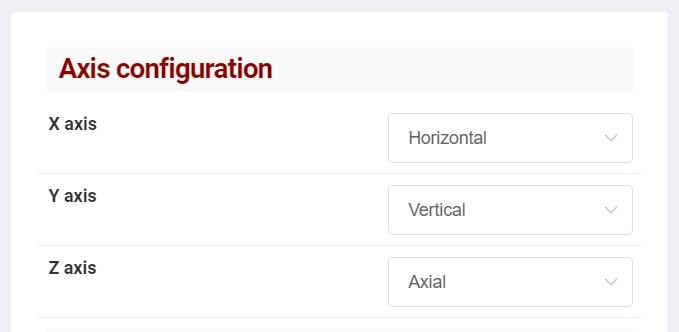
2.4. Axis Configuration
In the Axis configuration, we select a value for each phantom axis, we can set horizontal, vertical, or axial from the displayed list, choose your settings according to the sensor position as you saw in section 1. Machine Installation.
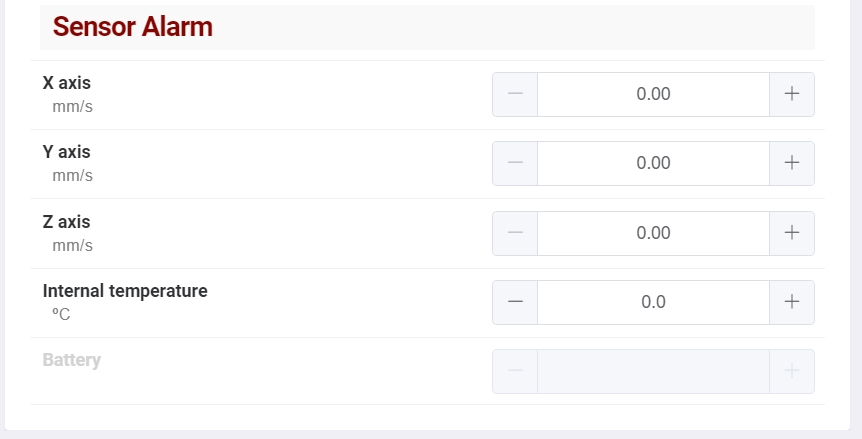
The “sensor alarms” section should not be modified, as these configurations are for the first-generation sensors that work with a gateway 1.
2.5. DigivibeMX® Final Step
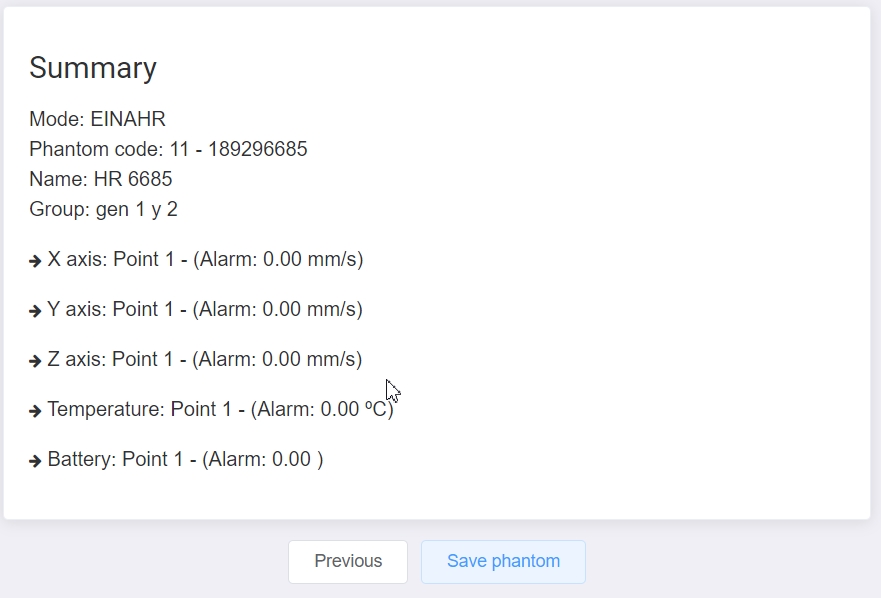
Finally, you will see a Summary of your phantom sensor configurations, click on Save Phantom, to save the changes:
3. Gateway 2.0 Configuration
Now that you configure your sensor on your Database on DigivibeMX®, you can continue with the settings related to the data acquisition, alarms, and more…
This is only the first steps to connect your sensor with your gateway 2.0, to know more about gateway configuration visit our Erbessd Instruments tutorials and go to Phantom > New sensors section.
If you have not yet configured your gateway 2.0 to send data anywhere; find two tutorials, which will help you to connect the Gateway to EI-Analytic or EI-Monitoring.
You can also visit our PHANTOM SENSORS WITH GATEWAY 2.0 tutorial to see all the settings available for your sensors.
3.1. Find and Pair your sensor
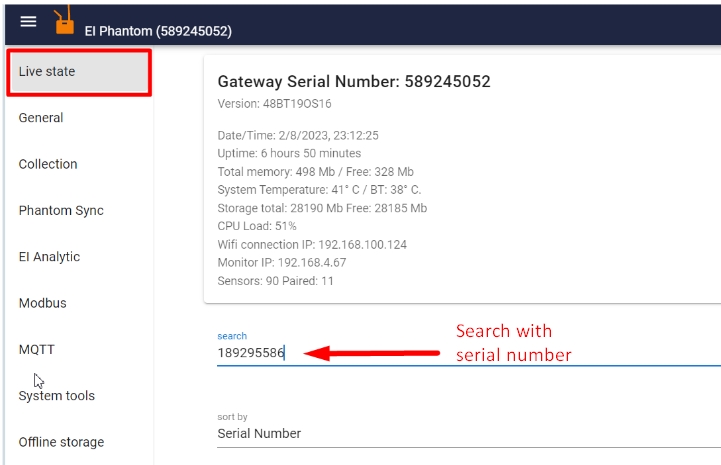
Access your gateway 2.0 admin console, once here, in the Live STATE tab you will see all the sensors detected by the gateway. In this section we must pair our sensors with our receiver, this is very important as the Phantom sensors will not automatically connect to the Gateway if we don’t do this.
Use Search and type your phantom sensor serial number to find it on the list.
Once you find your sensor on the list, click on PAIR to connect it with your gateway 2.0:

The sensor will record a signal the first time is paired to the gateway 2.0. Now you will see the state settings of the sensor, and on the bottom right you will have 5 options to configure your phantom:
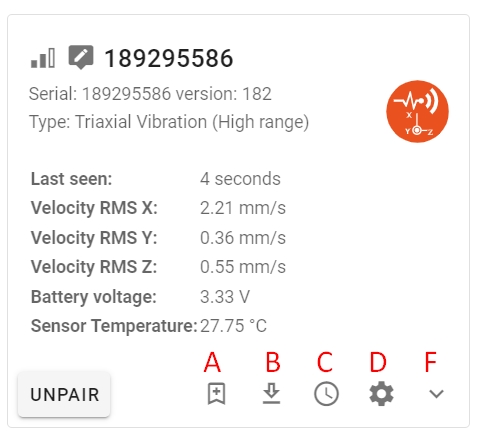
- A. Allows you to add this sensor in to your favorite’s list.
- B. By pressing this button, the sensor will record a signal on the moment.
- C. Here you will find the settings related to data collection, alarms and triggers.
- D. These are the in sensor settings.
- F. Displays more information about the phantom state.
Visit our PHANTOM SENSORS WITH GATEWAY 2.0 tutorial to see all the settings available for your sensors.