Learn how to create the connection between our cloud service and the most powerful gateway.
Enable Internet Connection
First of all is important to connect our Gateway 2.0 to a network. This can be done in one of two ways:
Connect the gateway directly to the modem using an ethernet cable.
Connect the gateway using Wi-Fi through a wireless network. You can learn how with the steps below:
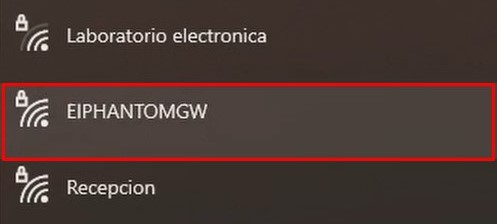
1- If your gateway receiver is new and does not have any configuration yet, it will emit a Wi-Fi network called “EIPHANTOMGW“. Connect to the network.
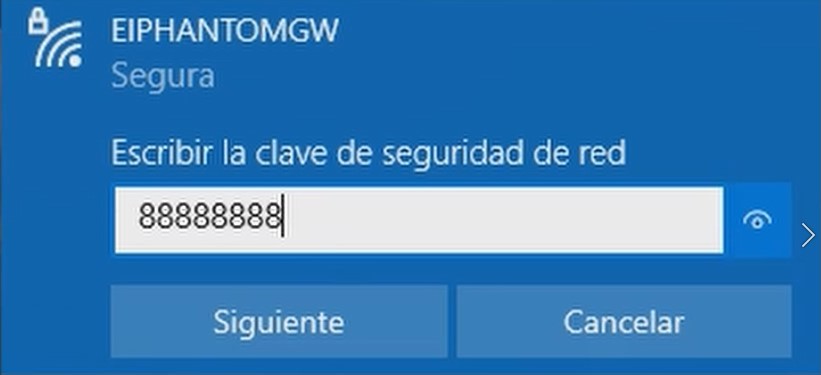
2- If necessary enter the gateway’s default password which is 8 times the number 8 (88888888).
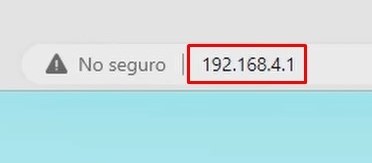
3- Once connected to the network, go to the web browser of your choice, and enter in the address bar the following IP address: 192.168.4.1
4- This will load the Gateway 2.0 settings screen. If the gateway is not yet configured to send data to any specific location, it will appear in red.
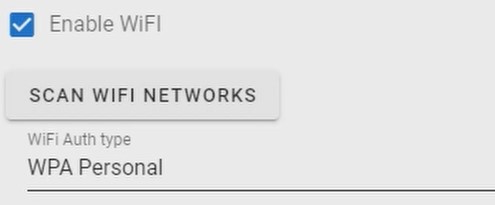
5- On the left side of the settings screen go to the “General” tab. Here click on the “Enable WiFi” option. And some fields will appear.
6- Click on “SCAN WIFI NETWORKS“, the button will change to the loading symbol, this means it is scanning. Wait until it finishes.
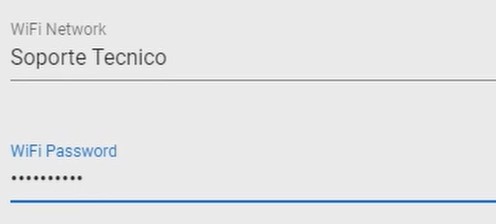
7- In the “WiFI network” section, expand the list and select the wifi network. Then enter the password on the “Wifi Password” section.
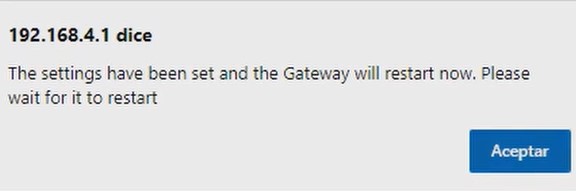
8- Once finished, click “SAVE“, a message will appear at the top of the screen, click “ACCEPT” to confirm the changes.
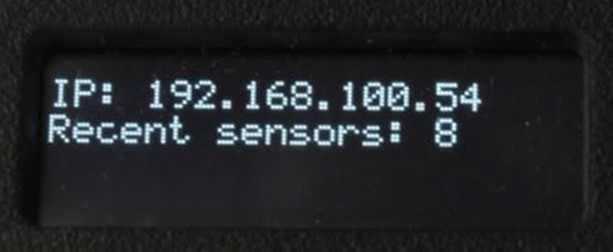
9- The page will lose connection, and the gateway will restart, and after a few seconds it will show a new IP address.
Enable EI Analytic Connection
When the gateway gets connected to the network with cable or wifi, connect the computer to the same network, and in a web browser enter the IP address that the Gateway 2.0 displays on the screen. This will load the configuration screen again.
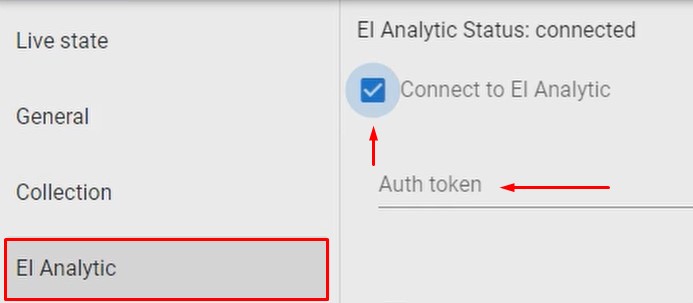
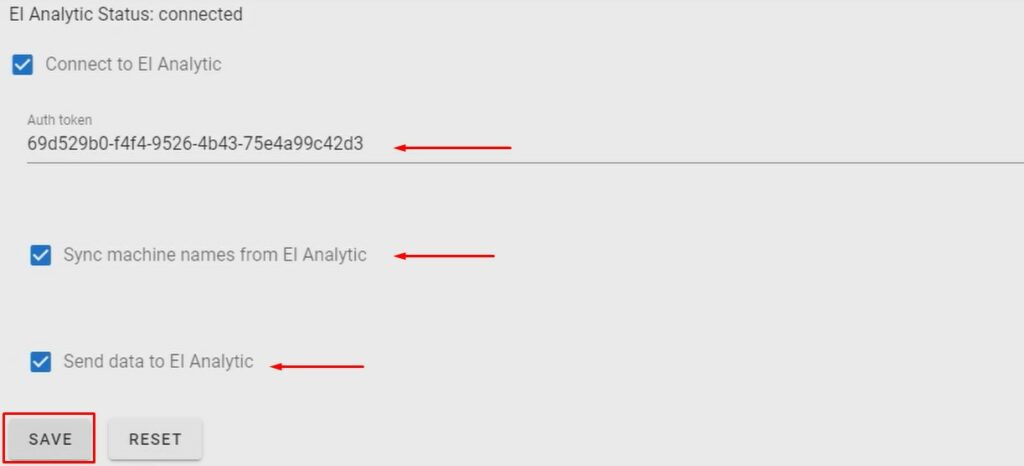
Go to the “EI-Analytic” tab, activate the “connect to EI Analytic” option and enter the “Auth token“.
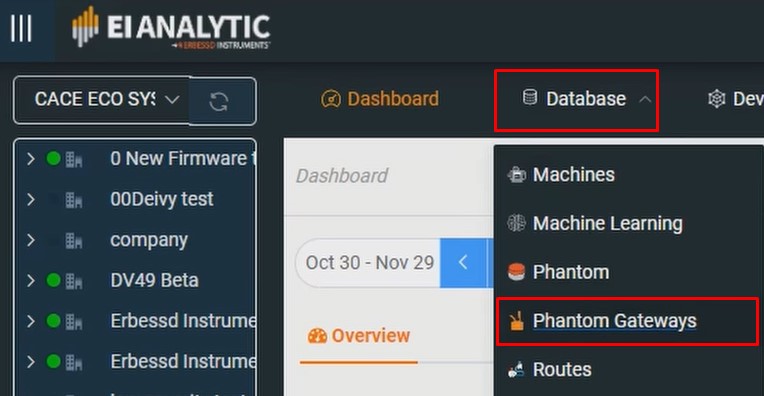
To generate your token you must login to EI-Analytic, then go to the “DATABASE” window and click on “Phantom Gateways”.
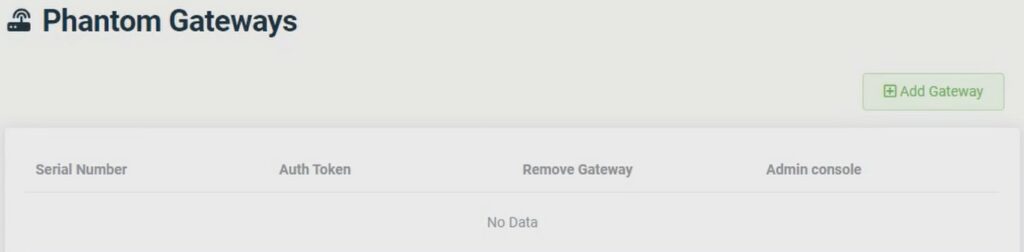
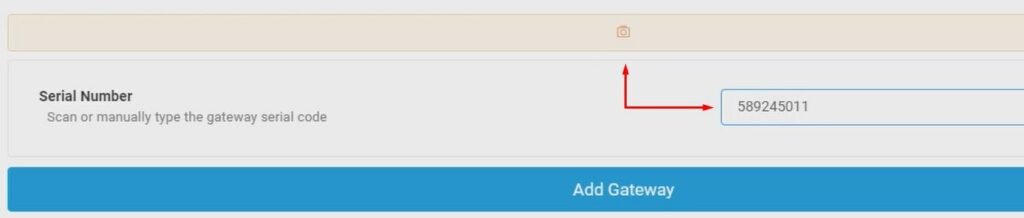
On the right, click ADD GATEWAY, manually enter the serial number of the Gateway receiver or scan the QR code with your device’s camera. At the bottom, click ADD GATEWAY.
The gateway serial number will be added to the list where an auth token is generated for that receiver.
Use this code in the Gateway 2.0 settings screen.
Now, activate the “Sync machine names from EI-Analytic” and “Send data to EI Analytics” options.
Once finished, click on “SAVE” to save the changes
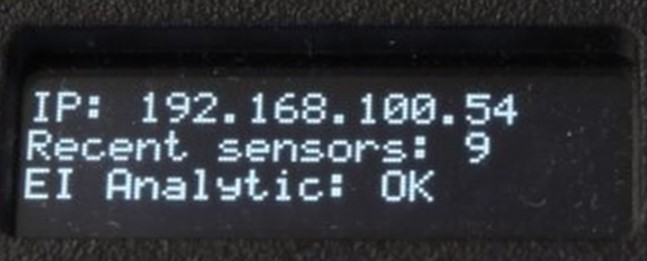
After a few seconds the gateway screen will show the IP address, and the legend “EI-Analytic: OK“
By following these steps your Gateway will be able to make a successful connection to EI-Analytic. If any of these steps are not shown as presented in the tutorial or you have any questions about any part of the process; do not hesitate to contact Erbessd Instruments technical support.