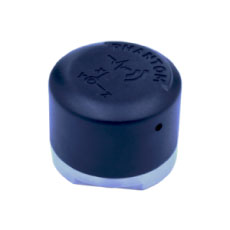
The Phantom Vibration Sensor is the best continuous analyzer in the market with the capability to measure up to 6,400 resolution lines. Here we will talk about the sensor configuration and more, if you want to know more about the Phantoms system, visit our Vibration Monitoring System section.
MACHINE INSTALLATION
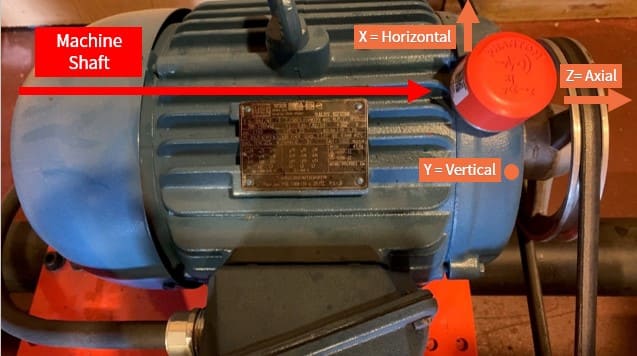
To achieve the correct vibration analysis it is crucial to know how the sensor is placed in the machine. The vibration sensor contains a triaxial accelerometer that measures vibration in three axes at the same time. The sensor also has an engraving on its front face that indicates the position of these axes. It is important to define the position of the sensor before its configuration in DigivibeMX.
The image below shows a Phantom Vibration Sensor placed on a three-phase motor. We can also see that the Z-axis is parallel to the axial axis of the motor; the Y-axis corresponds to the vertical axis, and the X-axis is orthogonal to the other two and corresponds to the horizontal axis of the motor. This means that in DigivibeMX we should use the following configuration: H for the X-axis, V for the Y-axis, and A for the Z-axis.
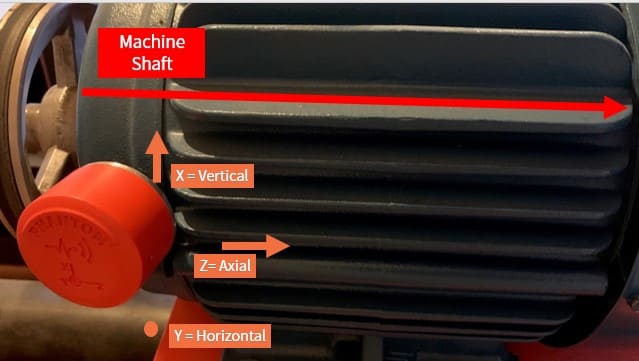
Another possible configuration would be to place the sensor in a plane transverse to the machine axis. For this configuration the values to be used should be as follows: H for the Y-axis, V for the X-axis, and A for the Z-axis.
DIGIVIBE CONFIGURATION
Here we will help you with the first configuration and setting of these Sensors. We will cover just the general configuration settings. For a more specific installation visit the Phantom Wizard tutorial.
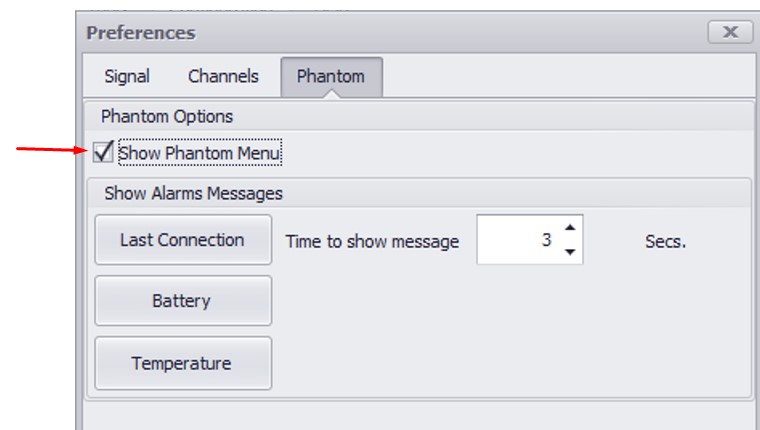
Now, the Phantom menu will show in the window’s menu bar. Go to the phantom window and select Wizard.
The Phantom Configuration Wizard screen opens in a new window. Click the Next button. Following we need to add our phantom device, in the select phantom window we have the next options: Option A allows us to manually enter a phantom code, and with option B we can scan the phantom QR code.
Add Phantoms
Manually
You can add phantoms by using an 11-digit ID code, select the Manually button.
The Code window opens. Manually enter the 11-digit Phantom ID code from the sensor’s QR label (2-digit sensor model code + 9-digit sensor serial number) into the Code text field. Then click the Ok button. The manually entered sensor will appear in the Phantoms added section. Sensors may be removed from the group using the Delete option
Scanning the QR code
(PC, laptop, or tablet computer camera required): Click the QR Code Reader button. The Code Bar Reader window opens.
Select the desired camera from the Device dropdown list. Position the QR label in front of the camera – squarely and close enough to be clearly read. The Code Bar Reader window will automatically capture the image, momentarily turn green, and document the sensor when it has read the QR code. It will then close automatically, and the scanned sensor will appear in the Phantoms added section.
Naming and configuration
We can organize ur phantom devices with the following tools:
- With the group box, we can select a previously group name from the list or tye a new one to create a group:
- In the name box, we can select a name for our device o to simplify the phantom identification:
- On the description box, we select what kind of phantom are we using:
- At least the Interval Send data establishes the sensor’s collection interval. The minimum value for data collection is 10 minutes, and the maximum is 1,440 minutes (1 day).
Once you’re finished click next.
Assing device
In the next window, we find the Assing Channels screen, here we can assign the device to an analysis point in a selected machine from the tree, we can only set one point per phantom:
Set the Axis and Alarms
Next, we have the set phantom alarms window. This window has two options, the Axis configuration, and the alarms.
In the Axis configuration, we select a value for each phantom axis, we can set horizontal, vertical, or axial from the displayed list.
In alarms, we can set a preset RMS and temperature threshold. If the alarm value is exceeded, the sensor will immediately wake and send an unscheduled data collection.
Completing Phantom Configuration
VIBRATION SENSOR’S MAIN FREATURES
- Wake up on high vibration levels to send data and alarms.
- Configurable Alarm interval and Programmable Internal RMS Trigger.
- Built-in integrator, it can internally calculate velocity parameters for alarms.
- Full waveform and spectrum data.
- Selectable Recording time 1s / 2s / 4s / 8s / 16s
- Configurable Measurement Interval
- Speed + Vibration Integration
- Configure your sensor using your mobile
- IP67 Design for protection from liquid and dust
Condition Monitoring & Industrial Automation | Modbus
Wireless Modbus Vibration Sensor — EPH Sensors include Modbus Protocol for industrial applications. Your Wireless Vibration Sensor is totally compatible with any PLC, SCADA system, or any other Modbus TCP / IP communication system. Learn More
VIBRATION SENSOR’S OPTIONS
Triaxial Wireless Vibration Sensor – High G’s | |
Learn more |  |
Wireless Vibration Sensor – High Sensitivity | |
 |
Learn more |
Phantom Gen 2 | |
Learn more |  |
ATEX Certified Triaxial Wireless Vibration Sensor | |
ATEX Certificate of Conformance Learn more | 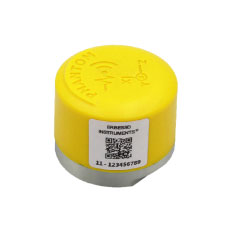 |
PHANTOM EXPERT (HIGH RANGE) – FIRMWARE 162
Bug Fixes
Solved issue when spectrum showed peaks after recording from WiSER Vibe or Phantom Manager.
Added default settings as follows:
- Max Transfer Power: 8 dBm
- Dynamic Range: 8G
- Interval Send Data: 3600 minutes (6 hours)
- Recording Settings: Max Fq 10kHz (1sec)
- Samples to record: Use max resolution
- RMS send interval: 3600 sec (1 Hour)
- RMS Calculation: Min 10Hz – Max 1000 Hz
- Enable permanent incoming connections: Disabled
Disable connection to Phantom gateway: Disabled