So, you’ve updated DigivibeMX 11 and now, you don’t know what to do with your old databases. Well, don’t worry, we have an easy solution for you. Here we will show you how to easily import old databases from DigivibeMX 10 to DigivibeMX 11
IMPORTANT: Before attempting to update you’re database we strongly recommend to copy and clone this database in other device or location to avoid accidents.
So, to achieve this feature you need to follow the next steps:
Step 1: create a backup for your old database.
Locate your current database file name, copy and paste in a safe location. Database file name is usually EIDB.eid and it is by default located under My Documents\Erbessd Instruments\Database
Step 2: Update database version
(This step applies only if you are currently using Microsoft SQL Compact Edition. By default Digivibe uses this option unless you have chosen otherwise during the first configuration)
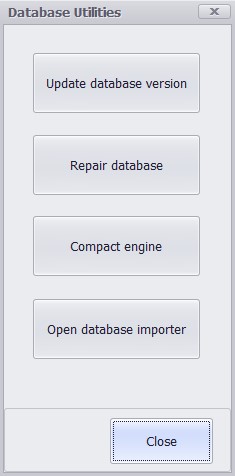
In the Database tab click the Utilities icon

Here you will find several possible options to manage your databases, and for this process we’re going to use first the “Update database” option.
Once done, this will open an explorer window. Find your database here and then, click Ok. A message with the text “Update successful” will appear with a countdown. When the countdown reaches 0, the database is now converted. But we’re not done yet.
Step 3: Import database
Now that we have our database converted to version 11 we need to import it to our new data base. First create a new database on DigivibeMX 11 an name it as you want. DigivibeMX 11 will connect automatically with this new database, but just to be sure doublecheck this information by letting your mouse on the text “database” on the tree and confirm the location of the database.
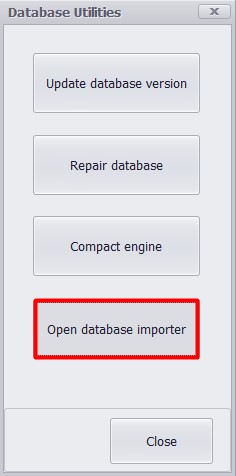
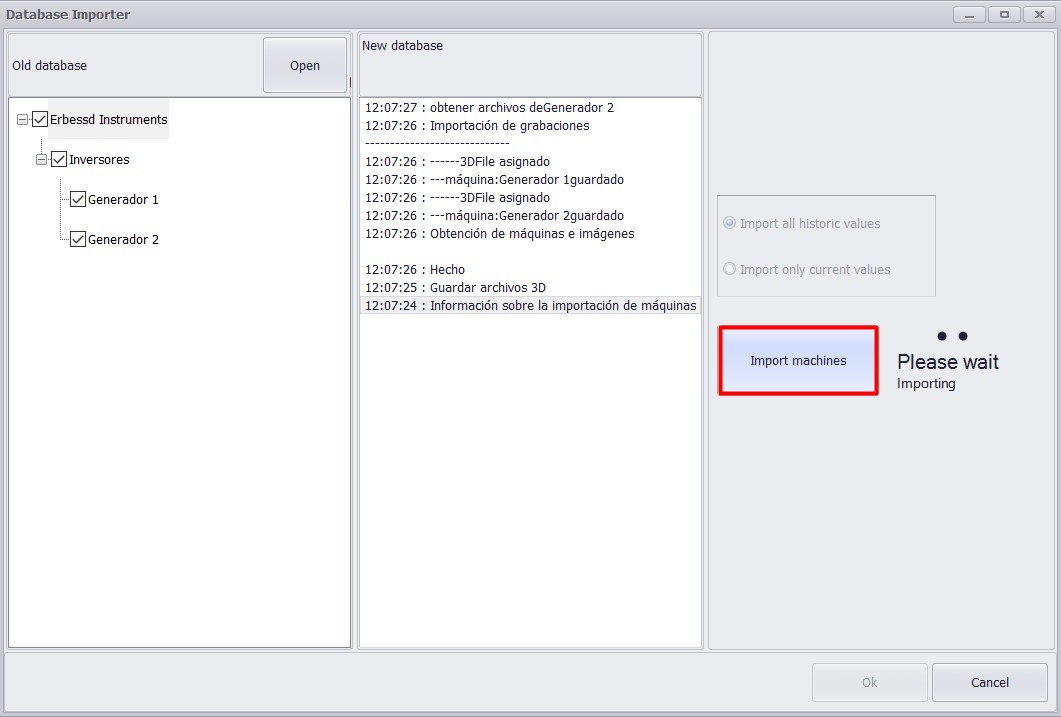
When you’re ready, open again the Database Utilities window but now, click on Open Database Importer.
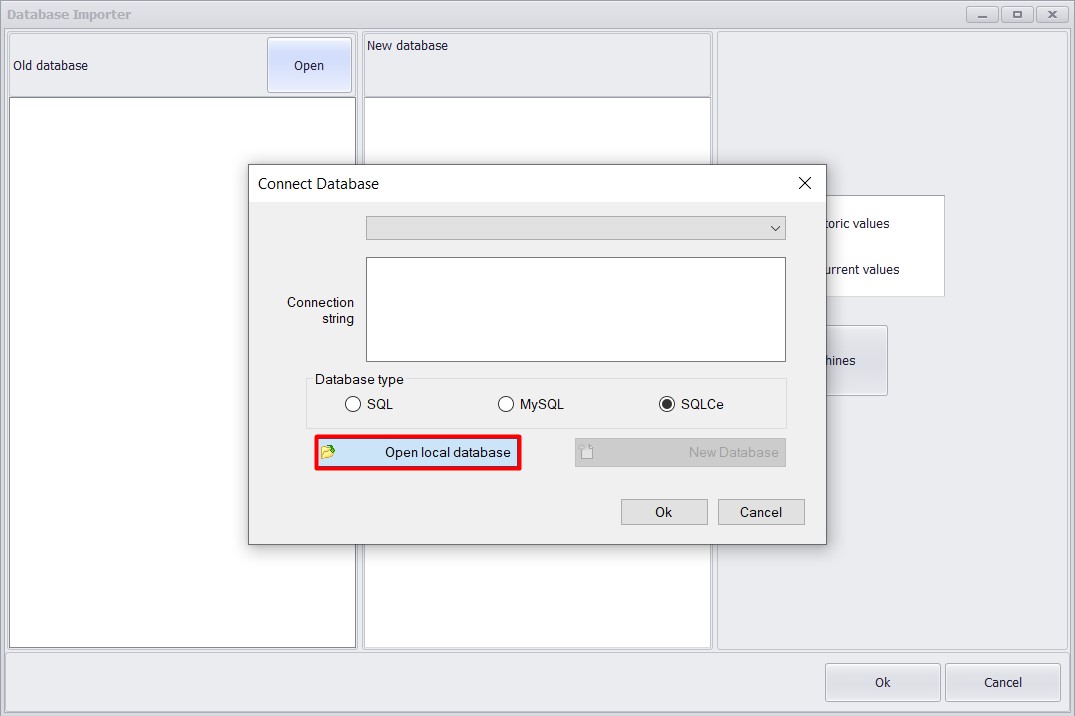
The window “Database importer” will now display where we need to follow some easy steps. First click the button Open which will display a new connect database window. Select SQLCe and then Open Local Database, this will open a new explorer window where you can find your newly transformed database. Select your database and click ok, and ok again.
Now back in the Database importer window you will find the machines contained in the older database, organized in the tree view; select the ones you want to import and now select the values you want to keep. When you’re ready and have everything you need selected, click on Import Machines and wait for the process to finish.
Once the process is done, all your companys, areas, machines and measurements can be found in the new database and can be now consulted and written as normal.