Gateway – Step by Step Initial Configuration
The Gateway Phantom are devices that link the Phantom condition monitoring sensors with the outside world (The cloud) or to your local database. This devices use to wireless protocols (WiFi y BLE 5.0) and also Ehernet conectivity. The data collected by the Phantom sensor are gathered trough the Gateway device and processed trough the EI Monitoring Service. So this makes the Gateway initial configuration a very important process.
In this tutorial you will learn how to do the Gateway initial configuration device step by step so that you have an effective conection with the EI Monitoring Service. For the initial setup of the Gateway it is necessary to have at hand an Ethernet cable and a paperclip. Also, you need to have installed the EI Monitoring Service.
WiFi Configuration.
First, connect your Gateway device to a computer or server via USB cable. Then, restart you Gateway trough the pinhole on the left side of the screen using a paperclip. You will notice that the device restarted once the Erbessd Instruments logo appears on the screen.
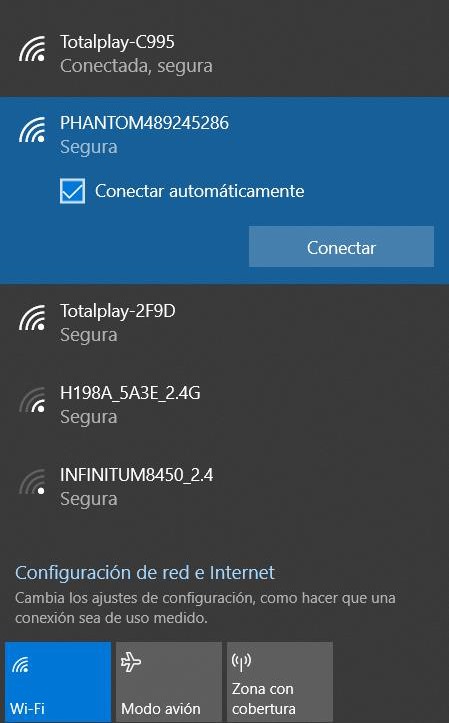
Select the Gateway device as a Wi-Fi network connection. The password of the Gateway network is “88888888” (eight times the number 8).
Network Configuration.
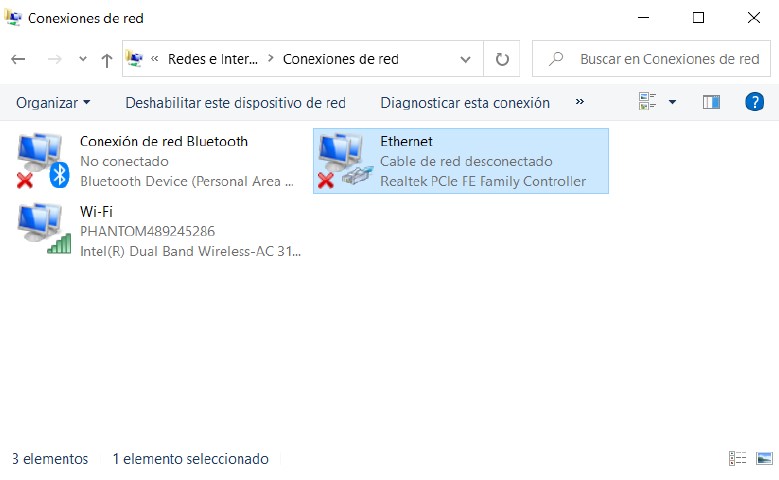
Once connected to the Phantom Network, go to Start and click on Control Panel. Proceed to click “View network status and tasks” in Control Panel window. Once “Network and Sharing Center” window is opened, click on “Change adapter settings”. This will open the “Network connections” window. Here double click Ethernet
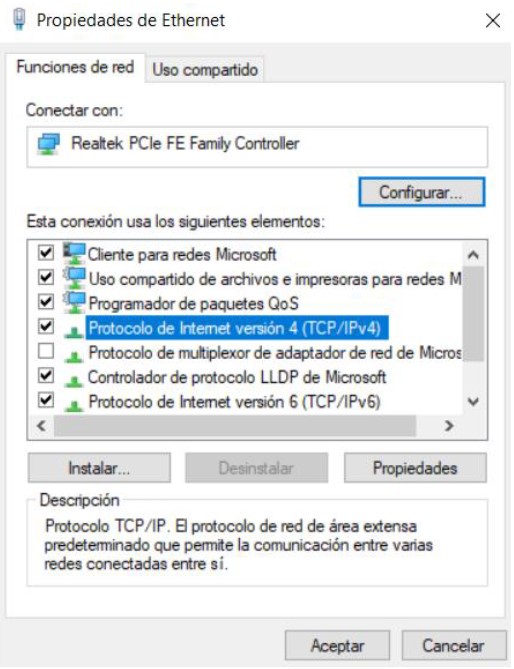
In the Ethernet Properties window, select “Internet Protocol version 4 (TCP/IPv4)”
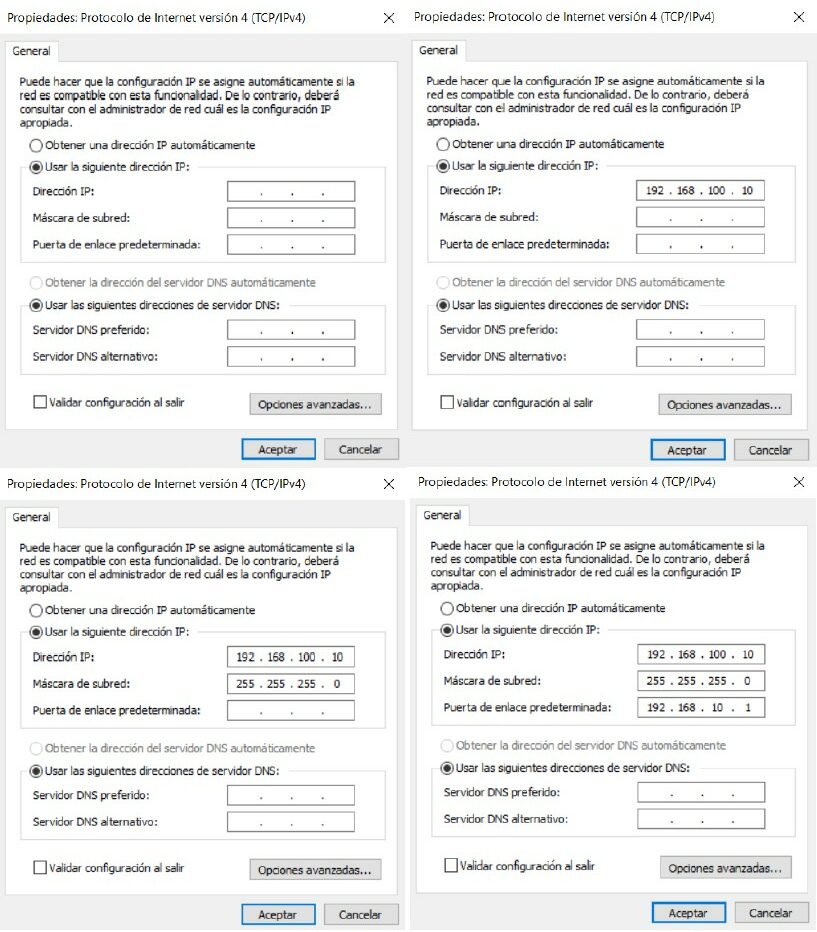
In the next window. Select “Use following IP address” and type the desired IP address in the box. The Subnet Mask will be generated automatically and then type the desired Default Gateway. Click “Ok”.
IP Configuration.
Once our network settings are configurated, open a web browser window and access to 192.168.4.1 to open the Gateway configuration page from Erbessd Instruments. Here, select “Static IP configuration”. Type the IP address you previously typed in the “Internet Protocol version 4 (TCP/IPv4)” but with a variant in the last numbers. Type the same Subnet mask and Default Gateway.
The last step, select “Static Monitor” and in the Monitor IP address type the correct IP address of the “Internet Protocol version 4 (TCP/IPv4)” window and then click “Save Settings”.
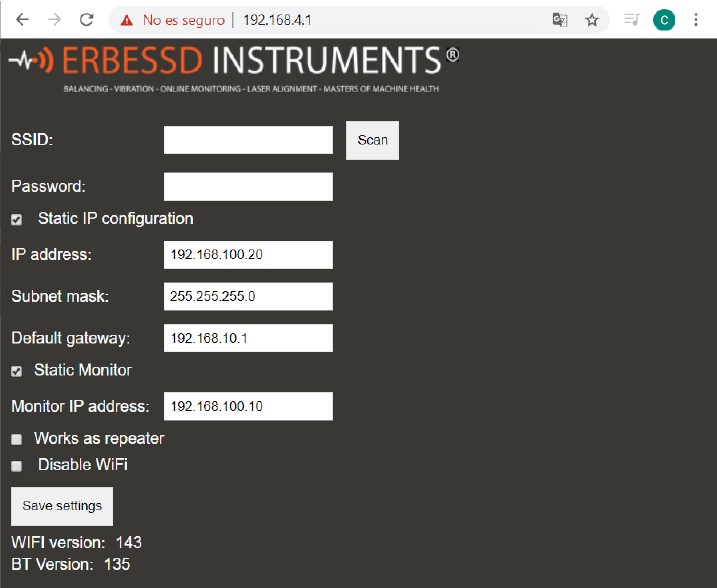
As additional features, this page also has two options:
- Work as a repeater: Phantom Gateways can connect either through your WiFi or Ethernet network or they can connect trough another gateway.If no WiFi or ethernet network can be setup, a Phantom gateway can connect to another Phantom Gateway that is already connected to either WiFi or Ethernet. To setup a gateway as a repeater only enable the “Work as a repeater” checkbox, nothing else is needed. No WiFi or network configuration is needed on this mode.
Phantom Gateways configured to “Work as a repeater” will automatically search for another Gateway that is already connected to the network and will autoconfigure themselves using a proprietary wireless protocol to send data to the closes gateway. No extra configuration is needed. - Disable WiFi: Gateway devices can be set up to connect trough a WiFi network by placing the access information on top of the page. However, you can also disable this option on the checkbox “Disable WiFi”. When selecting this feature keep in mind that the Gateway device will only be able to connect trough Ethernet cable to the network and no other way unless the configuration changes.
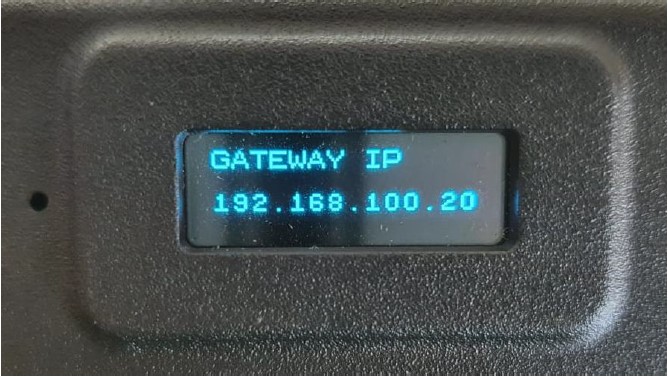
Then connect the Gateway with the Ethernet cable to the computer. This will make the device restart again. Once the device is restarted the screen will show the Gateway IP.
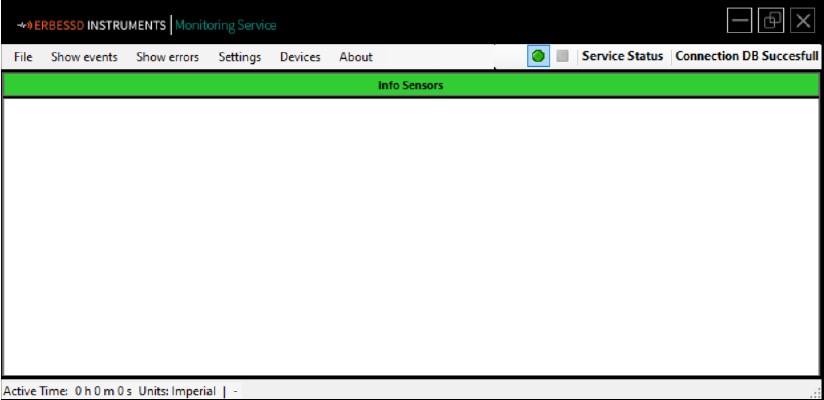
Once that the Gateway IP is shown on the screen, open the EI Monitoring software and click the green button to start service.
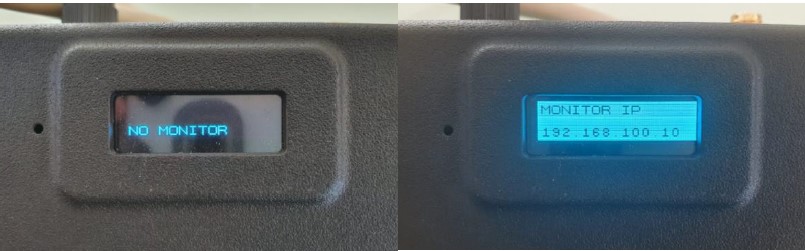
Now, to finish the Gateway configuration, wait a few seconds for the service to start and the Gateway now will change from “No Monitor” to “Monitor IP”
Now your Gateway is all set up and ready to use.