Learn how to change the settings of your Phantom sensors using the Gateway user interface. This configuration apply to ALL of the sensors that are paired with the Gateway.
Enable internet connection
First of all is important to connect our Gateway 2.0 to a network. This can be done in one of two ways:
Connect the Gateway directly to the modem using an ethernet cable.
Connect the Gateway using Wi-Fi trough a wireless network.
If you haven’t set up your Gateway to send data anywhere; you can learn how with the videos below:
Or if you prefer you can read the web version following this link.
Or if you prefer you can read the web version following this link.
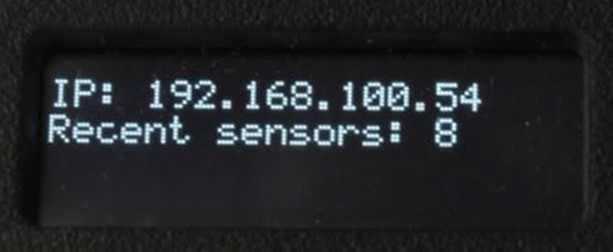
When your gateway is already connected to a network it will show an IP address on the main screen.
Global collection settings
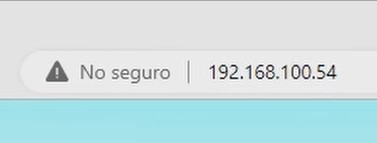
Connect your computer to the same network as the gateway, and go to a web browser, type the IP address in the search bar and press enter, this will load the Gateway settings page.
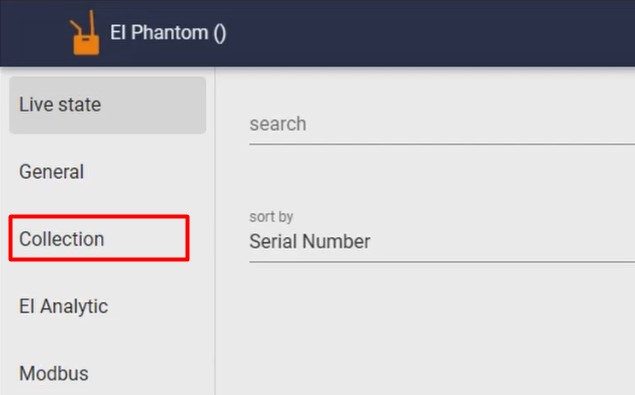
On the left, go to the “COLLECTION” tab. Here there are several collection settings that will be applied to the phantoms that you configure to take the global confiurations.
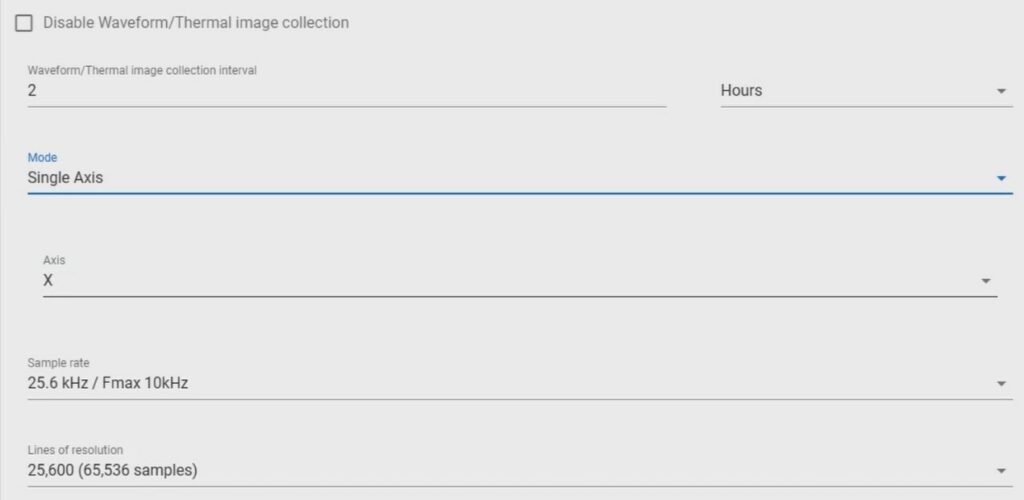
With the first option, you can disable the timewaveform and FFT ,and the thermal image collection of the Phantom sensors.
Below you can modify the sending interval of the Timewaveform/FFT and Thermal Images. On the right side you can choose between minutes, hours or days. And on the left side choose the desired value.
You can switch the “Recording mode” between triaxial and single axis. In the single axis mode; you can choose wich axis to measure or if you want to do a sequential measure of the three axis.
You can also choose the “Sample rate” and “Max frequency”.
Below you can select the “Resolution lines” and “Samples per channel”.
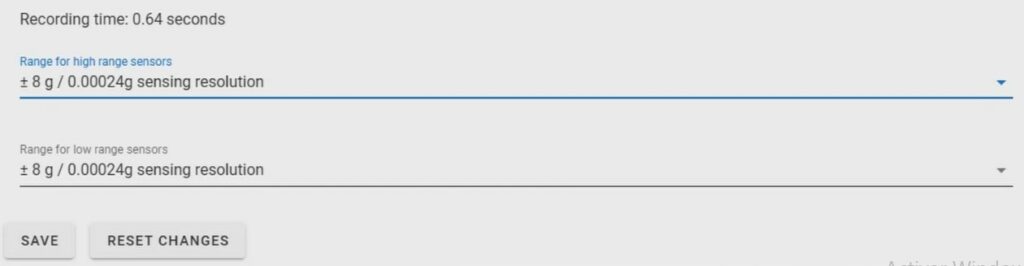
Then, you can change the “Dynamic range” of your High Range or High Sensitivity sensors.
Click “Save” when you finish to apply the settings into the Gateway.
If you wish to return to the default values, press “Reset Changes”.
Remember that these values will apply to all of the the sensors paired to the Gateway, but you can configure each sensor with custom settings. If you want to know how to apply custom setting for specifc sensors watch the video on the right. Or if you prefer you can read the web version following this link.
By following these steps your Gateway will be able to make apply recording settings to your Phantom Sensors. If any of these steps are not shown as presented in the tutorial or you have any questions about any part of the process; do not hesitate to contact Erbessd Instruments Technical Support.