To start this test, we configure the Trigger for the channel you wish to use, in this example Channel 1:
- go to the Menu top bar and select “Tools”
- then “Preferences”
- and “Channels”
The checkbox for Channel 1 must be selected. You can choose more than 1 channel if you want to activate the Trigger with other sensors.
Default trigger level is set at 1 mm/s but if the vibration is already high because other machines are nearby, then increase this value to the level where the Trigger is activated when you need it.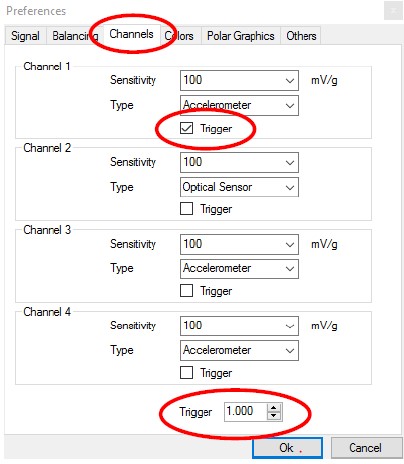
Start a New Analysis with 1 channel.
Depending on the interface (2-channel or 4-channel) and how many vibration sensors are already placed in other directions, select more channels: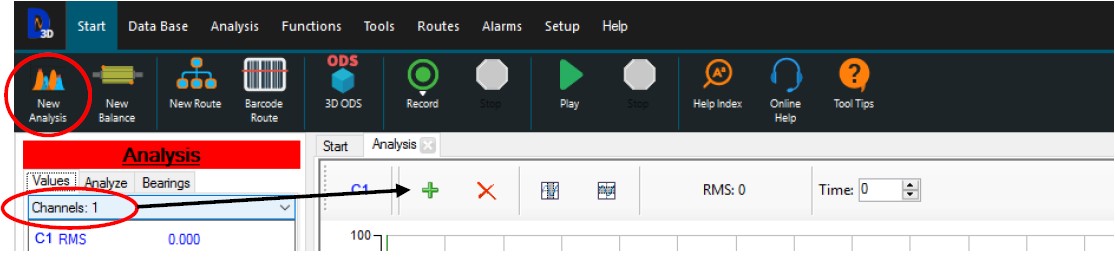
Select the recording time (in this example 5 seconds). To launch the trigger recording click :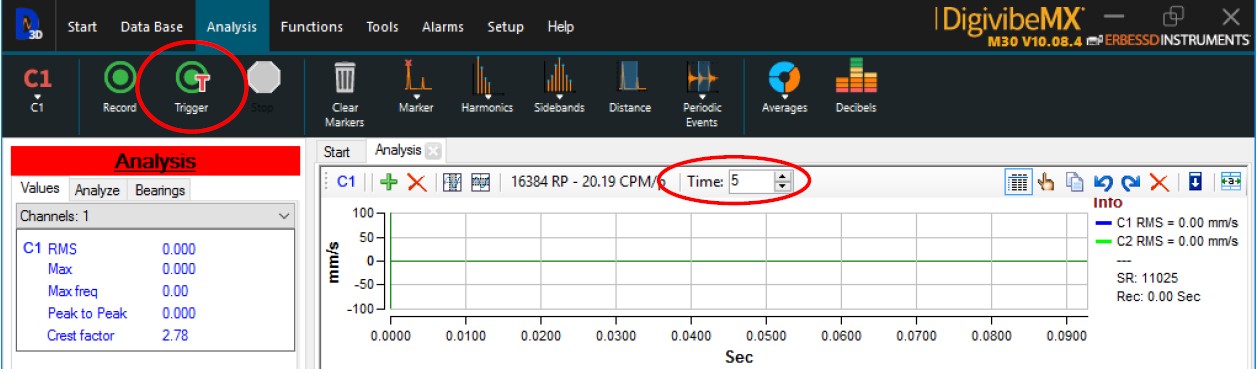
You are ready now.
Click on the Trigger recording button and you can see that the system is working and waiting the bump because:
- the left column shows measurements of small vibrations where the sensor is placed
- the graphics in time-domain and FFT are updating
- there is no decreasing counter on the right of the recording time selector
Hit the structure with a rubber hammer in a rapid movement and notice the decreasing counter starting
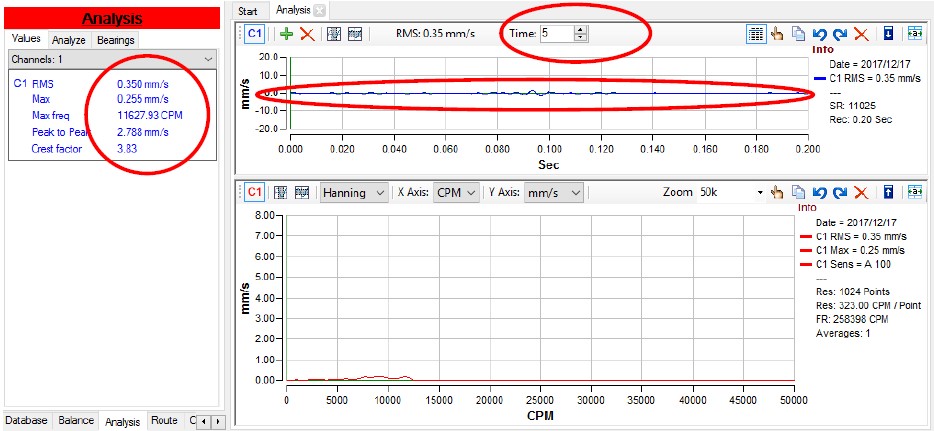
Let the vibration attenuate by itself until the end of the recording or stop the recording manually: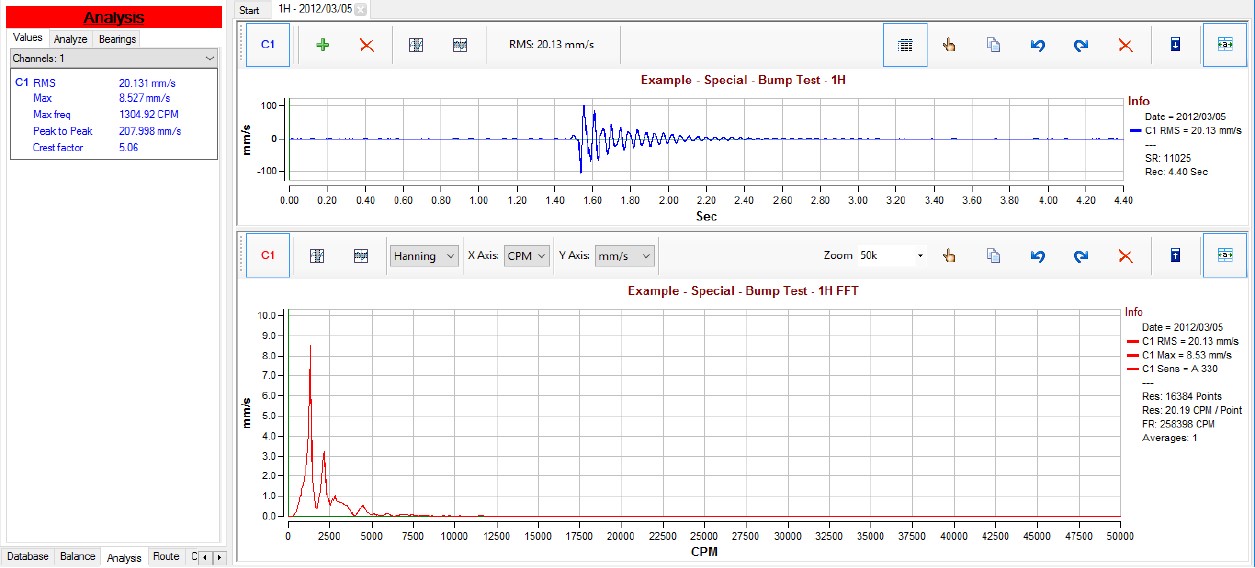
On the time domain graph, zoom-in the interesting zone avoiding the bump impact zone.
Left-click-and-hold in one zone and drag to another zone in the graph:
The resonant frequency of the structure you just hit (right-click on FFT graph for markers) is at 1332.53 CPM: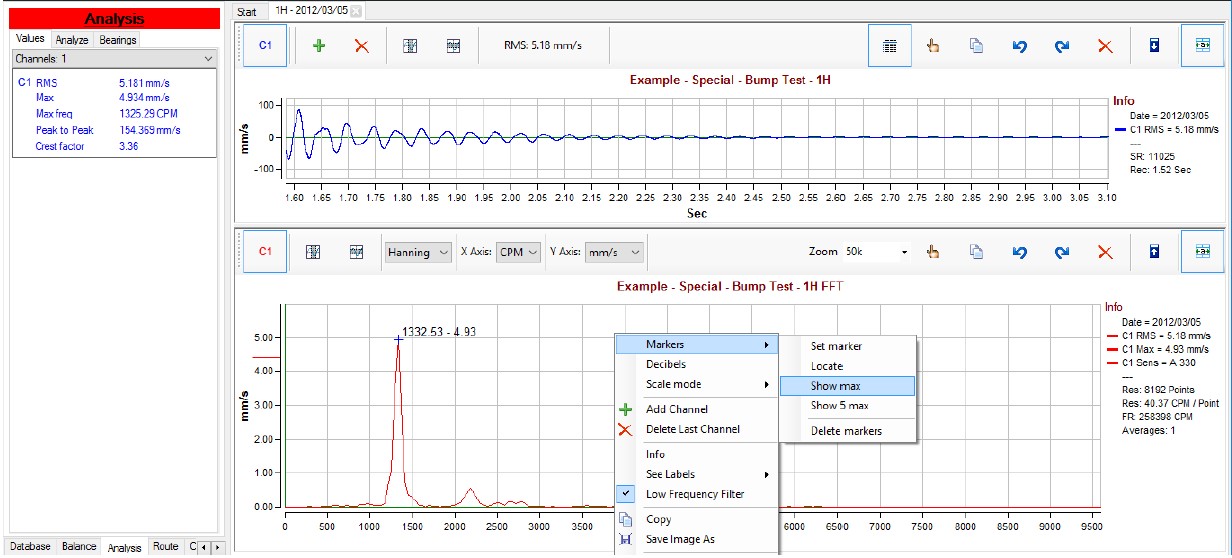
This test can be done placing the sensor in different directions or hitting the structure on other places and checking the results that can be very useful too to eliminate resonant frequencies that could lead to potential damage to the structure.
If you have any question, please contact us.